
The Perfect Cast-On for 1x1 Rib: Italian Tubular Cast-On
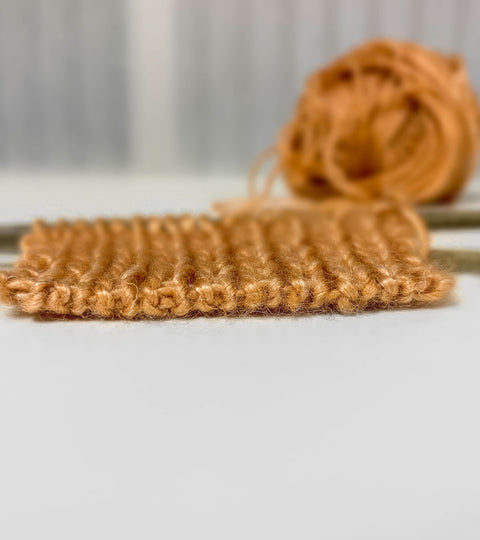
The Italian Tubular Cast On, also called “long-tail tubular cast-on” is an easy technique that creates a stretchy, beautiful edge. It works perfectly for 1x1 ribbing because it eliminates the ridge at the bottom edge created by the regular long-tail cast-on and resembles store-bought sweaters made by machine knitting.
I also like this technique because it does not use waste yarn, and once you finish it, you can start knitting right away.
Beautiful, stretchy, and professional-looking, the Italian Tubular cast-on is ideal for the brim of hats or cuffs of sleeves.
Step by Step Instructions —
Setting up —
Leaving a tail 2-3 times longer than the desired width of your cast on, make a slip knot.
Slip the slip knot onto a needle 1-2 sizes smaller than the required for the project and hold the needle in your right hand. This slip knot is your first stitch. Making an L with your left hand, grasp the yarn and the tail with the 3 fingers of your left hand over your palm. Position the working yarn over your index finger and the tail yarn over your thumb. We are ready to cast on a stitch now.
Casting on a purl stitch —
We will make 3 movements:
1- Move your needle over the working yarn, from the top of the index down.
2- Move your needle again to the other side, over your tail yarn this time, from the top of the thumb down.
3- Move the needle around both tails.
Casting on a knit stitch —
We will make the three movements again, but in different order:
1- Move your needle over your tail yarn, from the top of the thumb down.
2- Move your needle over the working yarn, from the top of the index down.
3- Move the needle around both tails.
Repeat this process casting on one purl, one knit stitch as needed.
Important: This will unravel if let go. Then, to secure your last stitch, make a back loop instead.
The stitches will be easily recognizable because a purl stitch will have a little bump while the knit stitch will not.
Foundation Rows —
It's very important to recognize if you have an even or an odd number of stitches and if the first stitch after the slip knot is a knit or a purl. On the Foundation Row 1, you will knit the knit stitches through the back loop, bring yarn to the front, and slip the purl stitches (purlwise). On the Foundation Row 2, you will knit the knits and purl the purl stitches purlwise with yarn in front.
- If you have an even number of cast-on stitches and you did a purl after the slip knot (like shown on the video), when you turn your work, you'll have a knit, purl, knit, purl sequence. Then, follow these 2 foundations rows:
Foundation Row 1: *K1 through the back loop, bring yarn to the front, slip 1 stitch purlwise, repeat from * to end of row.
Foundation Row 2: *K1, slip 1 stitch purlwise wyif, repeat from * to end of row.
- The same will be true if you have an odd number of cast-on stitches and you did a knit stitch after the slip knot. When you turn your work, you'll have a knit, purl, knit, purl sequence, ending with a knit. Then, follow these 2 foundations rows:
Foundation Row 1: *K1 through the back loop (tbl), slip 1 stitch purlwise wyif, repeat from * to last stitch, K1 tbl.
Foundation Row 2: *Slip 1 purlwise with yarn in front (wyif), K1, repeat from * to last stitch, slip 1 purlwise wyif.
- If you have an even number of cast-on stitches and you did a knit after the slip knot , when you turn your work, you'll have a purl, knit, purl sequence, ending with a knit. Then, follow these 2 foundations rows:
Foundation Row 1: *Slip 1 purlwise with yarn in front (wyif), K1 through the back loop, repeat from * to end of row.
Foundation Row 2: *Slip 1 purlwise wyif, K1, repeat from * to end of row.
- If you have an odd number of cast-on stitches and you did a purl after the slip knot , when you turn your work, you'll have a purl, knit, purl sequence. Then, follow these 2 foundations rows:
Foundation Row 1: *Slip 1 stitch purlwise with yarn in front (wyif), K1 through the back loop, repeat from * to last stitch, slip 1 wyif.
Foundation Row 2: *K1, slip 1 purlwise wyif, repeat from * to last stitch, K1.
Continue to Pattern —
If the pattern is going to be worked flat, remember to switch to the correct needle size, turn your work, and start the Rib 1x1 Stitch pattern.
If the project will be worked in the round, transfer all stitches to correct size circular needles. Do not turn your work, place marker, and join to work in the round, being careful not to twist the stitches.